We have all experienced this deeply frustrating scenario: rushing nervously to a local pharmacy or municipal post office, paying an outrageously exorbitant electronic processing fee, and waiting stubbornly in an endless physical line just to receive a highly unflattering, poorly framed mugshot with a flashed-out face. Thanks to the highly advanced digital lenses securely integrated into modern consumer smartphones alongside remarkably powerful web-based visual processing utility tools, you can actively and easily prepare completely flawless, government-compliant passport ID photos entirely from the relaxed comfort of your home. This specific problem matters deeply because federal immigration web applications are notoriously, ruthlessly strict regarding highly technical visual and physical dimensional requirements. If your digitally submitted facial photo fails the automated system software scan—due exclusively to an improper background lighting color tone, an incorrect pixel dimension, or a low DPI density—your entire federal paperwork application can reliably be aggressively rejected or severely delayed for agonizingly long months at a time.
Quick Solution
If you want to solve this problem instantly and clear your background for an ID photo, you can use our free Remove Background tool.
Steps:
- Upload your portrait photo
- Automatically remove the messy background
- Replace with pure white and download the clean result
Why Digital Background Removal is Absolutely Necessary
Traditional casual home lighting setups and room environments rarely match the perfectly pure-white, completely shadowless, high-DPI specification environments explicitly demanded by international border control systems. The ambient, warm lighting physically reflecting off your beige living room wall inherently creates a wildly incorrect colored background hue that biometric artificial intelligence algorithms will instantly reject. Thorough digital post-processing is absolutely critically mandatory to officially solve this annoying lighting discrepancy. By heavily utilizing precise dedicated image utilities, you completely bypass the frustrating physical photo booth entirely. Additionally, default cellular digital cameras generally shoot at a low 72 DPI metadata density naturally, while government portals comfortably only accept exact 300 DPI metadata.
Step-by-Step Guide
Step 1 – Open the removal tool
Start by navigating to a dedicated background removal application. A modern, efficient AI Background Remover reliably detects the human subject precisely and surgically strips out the messy local wallpaper background entirely without damaging your hair or shoulders.
Step 2 – Upload your file
Take your naturally lit selfie portrait shot facing a bright window. Have a friend or relative press the capture button standing roughly 4 feet away to avoid optical distortion. Then, securely upload this direct original photo locally into the browser interface.
Step 3 – Adjust settings if needed
Once the background is transparent, replace the underlying visual canvas instantly with perfect pure solid white. If the official government web portal strictly demands exactly 300 DPI embedded metadata but your consumer phone natively shot at a much lower standard definition, securely run the final photograph confidently through a powerful professional DPI Fixer to dynamically rewrite the internal image properties. In parallel, ensure you strongly utilize a rigid, high-precision Image Cropper tool to measure the picture and accurately slice the image to a standardized acceptable measurement of 2x2 inches.
Step 4 – Download the final result
After visually ensuring all the dimensional web formats comply with the required structural criteria, securely download the properly optimized file result to your local laptop or phone storage without any privacy degradation or quality loss.
Common Official Civil Use Cases
Generating correctly compliant identity photographs locally represents a massive time-saver for crucial personal identification documentation. Providing strict government agencies with the perfect dimensions will expedite application forms cleanly and swiftly.
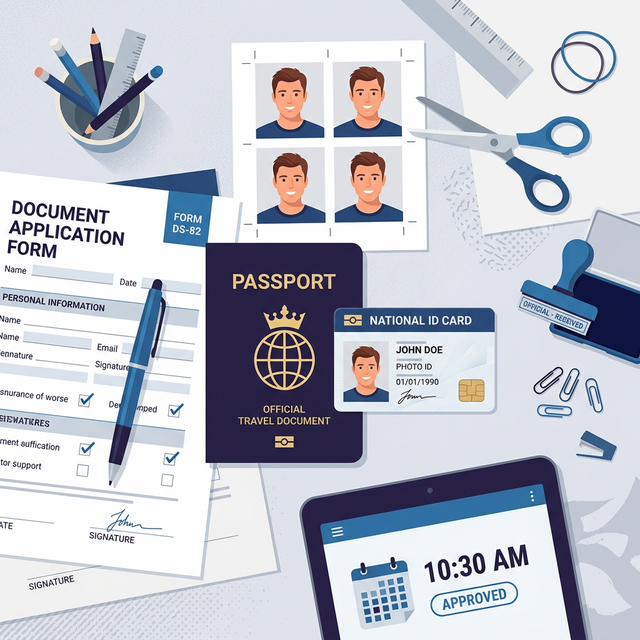
- Federal Passport Renewals: Confidently meeting the highly strict exact 2x2 inch physical template format and pure stark white sterile background rules strictly officially demanded for standard US federal applications.
- International Immigration Visas: Correctly generating strict official green card diversity lottery fully compliant passport photos that explicitly require exact standardized 300 DPI embedded metadata.
- Corporate Professional HR IDs: Providing the remote human resources department with a significantly clean, highly evenly lit, modern attractive professional corporate digital headshot strictly centered on a perfect digital white backdrop.
Essential Tips and Important Camera Notes
When attempting to capture the initial raw portrait at home, never lazily use the front-facing wide-angle selfie camera lens. It scientifically causes severe optical "barrel distortion," practically making your central facial nose appear significantly larger and your side ears strangely unnaturally smaller. This visual bubble effect routinely causes an immediate rejection by strict digital biometric face-scanning algorithms during the application submission process. Also, ensure the image file size is sufficiently lightweight to upload over the web. You can compress the document size gracefully using a standard Image Compressor.
Frequently Asked Questions
How can I confidently secure a solid white background for my mandatory passport photo?
You can effortlessly utilize a free web-based AI background remover utility to cleanly detach your primary subject confidently from the distracting room background. Then, you can immediately replace the cleared area with the required pure solid white formal canvas color easily.
What is exactly the correct physical dimensional size for a verified US passport photo?
A functional standard US passport digital photograph must be strictly framed at exactly 2 x 2 physical inches entirely precisely. Furthermore, the actual physical head dimension must measure actively between exactly 1 inch to 1 and 3/8 inches respectively from chin to crown.
How do I reliably fix the digital DPI density metadata of my ID photo?
Instead of purchasing or downloading massively expensive software physical programs natively to locally edit your image precisely, simply utilize an extremely simple web-based DPI fixer utility smoothly and smoothly to securely rewrite your internal image metadata directly and dynamically.
Can I actually successfully take my official passport photo independently at home?
Yes, absolutely. As long as the newly generated digital camera portrait successfully meets all strictly mandatory official government visual requirements consistently regarding perfectly flat daylight lighting, a purely solid plain bright background, and the necessary exact correct geometric dimensions.
Related Tools
Comments
Loading comments…